How to Malt Barley – A Detailed Guide To Get the Most Out of Your Brew
 Malt barley is used in various food products – right from vinegar to milkshakes. However, barley primarily goes into the making of beer. But for that, barley is subjected to various processes that give it its flavor and aroma.
If you want to make malted barley, this article is for you.
We will discuss what exactly malt is in brief and everything that goes into the process of making malt for beer.
How to Malt Barley
The malting process is primarily divided into three stages, namely:
- Steeping
- Germinating
- Kilning
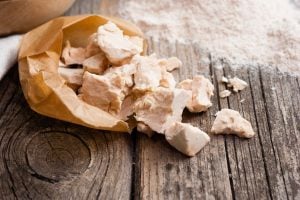
Barley malt is a natural food product. The process of cultivation includes germinating and drying barley. All this takes place under duly controlled process conditions. The source of good malt is good and clean barley.
Therefore, the first step in malting barley involves duly cleaning the barley upon arrival. Once cleaned, the barley is then sized. Before learning the process in detail, let us first understand what exactly malt is.
– Steeping
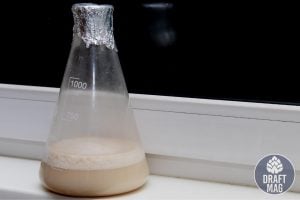
Steeping includes soaking an organic solid or a liquid (in this case, barley) in water to extract the flavor and soften it. Steeping is responsible for initiating the malting process as it provides water and oxygen to the barley embryo.
In addition, this process causes the hydration of the starchy endosperm present inside the barley. This hydration helps break down the hydrolytic enzymes and prepares them for germination. Courtesy of the hydration, the barley begins to respire, taking in oxygen and releasing carbon dioxide, generating heat in the process.
Once again, the barley is washed and cleaned. This is done to get rid of any materials that may hinder the malting process whatsoever and to get a smoother extract.
-
Precautions While Steeping
Steeping primarily depends on the grain type and size but usually takes around 24-48 hours to complete. Once the barley reaches the desired moisture level, it begins a uniform breakdown of starches and proteins. The steeping process is then deemed complete.
NOTE: You must wash barley at least twice. Not doing so can hinder the process, in turn hampering the final malt quality. Note that the germination process should start only after the barley attains a sufficient moisture level.
– Germinating
The barley is carefully transferred into a germination vessel upon reaching its target moisture level. The germination process takes up to five days, depending on the grain type and size. All these factors need to be considered in the expected malt specifications.
Germination refers to the growth and modification of the grain. In this phase, rootlets emerge from outside the grain, leading to an acrospire’s growth. Here, modification refers to the breakdown of proteins and carbohydrates. This breakdown eventually leads to the opening up of the starch reserves present within the grain.
-
Ideal Germination Conditions
To maintain the supply of oxygen to the grain, cool and humidified air is provided to the germination vessel. In addition to supplying oxygen, this keeps the barley at the required moisture level while simultaneously carrying away the emitted carbon dioxide and generated heat. The temperature here generally ranges between 14 to 20 C depending upon the grain size and the type of malt being brewed.
The grains are subject to periodic rotation to avoid clumping and non-uniform heating. Despite the advanced machinery used, a craft maltster must always supervise the germination process to keep track of the degree of modification and the smell.
– Kilning
Once everything is taken care of, the malt is carefully moved into the kilning vessel. This vessel is designed explicitly to carry out this third and final step into the malting process. When the malt is transferred into the vessel, the vessel is subjected to a warm and dry air supply.
This is done to get rid of the excessive moisture, develop the desired color, and add flavor to the malt. This process generally takes between 24 to 36 hours.
Kilning is done primarily to induce enzymatic activity and friability. It is done in two different phases: the Withering Phase and the Curing Phase.
- During the Withering phase, the malt is cooled to room temperature to prevent further color formation and enzyme destruction.
- Meanwhile, the curing phase includes cleaning the malt to remove loose rootlets, sprouts, and husks.
Once all this is taken care of, the finished malt with about 4 percent moisture can be stored.
Can You Malt Barley at Home?
Yes, it is possible to malt barley at home. Those who love to explore new things can definitely try malting barley at home. Although the time commitment can be a challenge, careful planning will make it easier.
When you malt barley at home, you can try out various combinations and even malt flavors of the heritage grain varieties or try out new malt styles that are commercially unavailable.
To malt barley at home, you are going to need the following types of equipment:
- Bucket
- Fine Grain Barley
- A bucket with a drain valve
- 55F Water Source
- Strainer
- Climate-Controlled Space
- Mesh Bag
- Spray Bottle
- Oven
- Thermometre
- Dehydrator
- Sieve
- Plastic Container
 Besides the equipment, you also need to keep track of the conditions you are going to be malting barley in.
You need 50 to 60 F ambient conditions, a climate-controlled space with a temperature around 55 F, and humidity of 95 percent or more.
– Procedure
Once you have taken care of the equipment, you can move ahead and implement the below-mentioned procedure:
- Weigh out your barley evenly in a large bucket
- Start with five pounds of barley to get at least four pounds of malt.
- Set aside a grain sample to monitor the moisture
- Record the weight of this grain sample
- Keep track of the moisture throughout the procedure as it indicates the malting process progress.
- To track the moisture, weigh this grain sample periodically
- Any change in weight will automatically notify you about the new moisture content
Use a mesh bag to hold the grain sample. Ensure that you expose the grain sample to the same temperature and moisture as the rest of the grain. This way, you can ensure that the sample kernels do not escape during the procedure.
– Washing
Purchased grain has already been through a seed cleaner. These grains tend to get dirtier due to prolonged exposure to dust and other particles. Although malting doesn’t require painstaking sanitation of the grain, the washing step is crucial to every malting process. Therefore, do NOT skip this step at any cost.
- Fill the large bucket with warm water until there are 4 inches of water above the grain.
- Vigorously stir the grain.
- Once the thins are up, the viable grain goes down.
- Now, rouse out the viable grain from the bottom of the bucket and put it into another bucket.
- Use a strainer to skim the thins from the water surface.
- Continue to skim and rouse the thins until only the visible grains remain.
- Now, throw the dirty water away and refill the large bucket with warm water till there are four inches of water above the grain.
- Repeat the stirring, skimming, and roasting process until there are no thins left whatsoever
- Stop when you notice the water is crystal clear.
You will need to repeat this procedure at least thrice to get crystal clear water on the surface.
– Steeping
This is where the actual malting process begins. The process will hydrate the grain to make germination easier. It awakens the dead grains by exposing them to enough water and oxygen.
You will require at least three steep cycles. Note that the moisture level must be maintained at 45 percent for the germination phase.
- Fill the large bucket with cold water until the water level is one inch above the grain level.
- Keep the water temperature at 55 F.
- Now, place the bucket in a temperature-controlled space which will ensure a constant temperature of 55 F. For this, you can use a fridge or any insulated structure whose temperature can be set and monitored using a temp controller.
- Now, put the thermometer in the middle of the grain bed.
- Ensure that the temperature remains between 55 to 60 F. If the temperature rises above that, you will notice an uneven water uptake.
- After steeping, drain the water from the bucket and expose the grain to air for an air rest.
- After that, repeat the steep cycle.
- The standard steep schedule is to alternate between 8 hours of steep and 8 hours of air rest until the grain hits 45 percent.
The alternative steep schedule can be challenging to maintain if you have a full-time work schedule. In such cases, you can subject it to eight hours of steep and an air rest of 12 to 16 hours. Ensure that the moisture attained is precisely 45 percent.
If you fail to attain the target moisture, spray the grain with water and mix it around to bump the moisture around
– Germination
In this step, you notice physical changes in the grain. Rootlets will push out of the husks, whereas the grains will shoot, length, and grow inside this husk. You can easily pull and roll the kernel with your fingers. In this step, you will need to mix the grain and track the modification as and when it occurs.
- Move the grain from the bucket into the germination vessel and spread the grain out in the container.
- Maintain a depth of one to four inches
- Turn your grain several times during the day. Ideally, we suggest you grain at least four times during the day.
- This step is ideal for respiration. As respiration increases, the heat generation will also be increased.
- If you notice excessive drying on the grain when turning, lightly spray the grain with water and turn it again.
- If you smell cucumbers or freshly cut grass, it indicates that the process is going smoothly. Whereas if you get a moldy/rotten smell, there might be something wrong.
– Kilning
Kilning stops the growth and makes the starch available for use. Adding water to the grain kickstarts the enzymatic process. Your job is to take this malt and store them for the duration of the malting process.
Trace the given steps to start the kilning process:
Drying
- Dry the grain using either a dehydrator or oven
- Load the grain into the dehydrator tray (if using a dehydrator)
- Using the dehydrator, blow air past the grain. This will remove the moisture
- Next, dry your grain at 120 F for at least eight hours
- Remove the bulk of the water to commence the free drying stage
Curing
- Slowly raise the temperature to 150 F and continue kilning. This is done to remove the moisture which is stored beneath the grain.
- For base malts, cure at 200 F for at least three hours
- When the temperature drops below 10 percent, it is time to start curing
- Make small tweaks to the kilning schedule to match your setup and the batch size
- Take moisture readings at regular intervals to know when to ramp up the temperature and when to end the kilning process
- Make sure you end with final moisture of four percent
Deculming
- When done, remove the grain from the dehydrator or oven to let it cool down.
- Next, remove the rootlets.
- Mix the whole batch in the bucket using your hands
- Rub the grains together to commence deculming
- Transfer the grain to a sieve
- Shake it above a surface that you can sweep
- The rootlets will automatically fall through
- Once you have cleaned the whole batch, store it in an airtight bag until you brew
FAQ
How long do you soak barley for malting?
Barley is typically soaked for 8-12 hours before malting to achieve optimal moisture content.
What temperature is barley malted at?
Barley is typically malted at temperatures ranging from 55°C to 65°C.
Can you malt dried barley?
It is not recommended to malt dried barley as it can result in poor quality malt due to uneven germination.
Endnote
 Now that you know the process of making malt for beer, you can brew the kind of beer you desire at home. Here are a few things you need to keep in mind:
- Cleaning is a crucial step when you make malt barley. Make sure you are not negligent in this process.
- Optimum temperature maintenance at various stages is also a crucial factor.
- You need to observe three steps to malt barley: steeping, germination, and kilning.
Malting barley at home is a very time-consuming process. Thus, you need to be patient and plan things well in advance. Make sure you do not skip any stage due to improper scheduling.