How to Kettle Sour: Tips for Homebrewing Sour Beer in Three Days
 You can learn how to kettle sour in just a few relatively straightforward steps.
Kettle souring is a simple beer brewing technique with a couple of modifications to the standard process, but it is a quick, efficient and effective method of brewing sour beers.
Homebrewers can brew high-quality tarty beer within a short period with this unique technique.
Continue reading for a detailed expert guide on brewing kettle sours at home!
What Is a Kettle Sour?
A kettle sour is a beer that undergoes fermentation in the presence of a probiotic bacteria, often Lactobacillus, which leads to a distinct sour taste. This is the same bacteria that gives yogurt its tart sour taste. The bacteria proliferate in the beer for about two to three days, releasing lactic acid. The acid then gives the resulting brew its sour flavor.
If you are a beer lover who likes to try out different beer styles, you probably already know about this group with a distinct sour taste. These are the beer types we are referring to. Kettle sours are perhaps the most common sour beers in craft breweries across the United States.
Customarily, sour beers demand long aging periods for the bacteria and yeast cultures to turn brews into the enjoyable complex tart delight. However, many homebrewers don’t have much time for this to occur. Imagine having to wait two years before complete souring happens. This is where the kettle souring process comes in, because it is the ultimate quick souring technique.
How to Kettle Sour: A Step-by-Step Guide
Below are detailed guidelines on how to effectively and efficiently go about kettle souring beer. Follow each step faithfully, and you can be sure of getting an intriguing, premium quality craft beer at the end of the process.
-
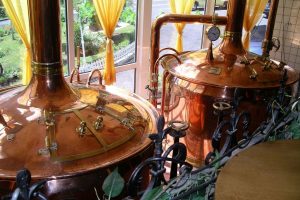
Step 1: Preparation
Just as you shouldn’t embark on any project without proper planning, the same applies to kettle souring. Maybe even more so, as the process can be quite rigorous. However, the whole process shouldn’t take you more than two days to finish brewing. It would be best to clear your schedule, so you can face the task head-on as you kickstart the brewing process.
To ensure a successful kettle souring homebrew, ensure you have all the necessary materials, equipment and ingredients needed for the process.
Some of the materials you will need include:
- The brew kettle – most of the souring process occurs here
- The probiotic bacteria – lactobacillus, which adds the sour flavor
- Malt – any grain bill of choice is nice
- Wheat is a good option for kettle souring
- Other materials include a thermometer, yeast, hops of choice, electric blanket and the pH meter
You must also ensure that all your equipment and materials are clean and sanitized before use.
-
Step 2: Make a Mash
Mashing is the first step in the kettle souring process, just as with the standard brewing processes. Mash your already crushed grains using any method you are familiar with from brew in a bag, all-grain system, partial mash, or extract.
Once mashing is completely done, extract and collect the wort into the brew kettle.
-
Step 3: Pasteurize the Collected Wort
Some people may tell you to skip this process, but we don’t think that’s good enough. It is important to pasteurize your wort. Pasteurization involves heating the wort for a period of 10 to 15 minutes. The process kills every bacteria form present in the wort.
The kettle souring process involves working with microorganisms. Hence, ensuring that all equipment and ingredients are sterile is of utmost importance. Your don’t want your beer contaminated, so you must ensure cleanliness at all times.
-
Step 4: Chill the Wort
Chill your wort with the aid of a sterile wort chiller. Ideally, chill until it reaches a temperature range of 80 to 100 degrees Fahrenheit, which will be good enough. However, if the specifications for the lactobacillus strain you are using says otherwise, follow it.
A wort chiller aids in hastening the chilling process. Also, rapid cooling of the wort reduces the risk of contamination. Since the wort is no longer heated, there is an increased risk of contamination if just left down to cool on its own. It may also improve the clarity of the final brew.
-
Step 5: Acidify the Wort
Lactobacillus and many other probiotics are intrinsically acid-resistant bacteria, and they will not thrive in an alkaline environment. This is why we need to acidify the wort. The most suitable acid for this is lactic acid since the bacteria you will be working with yields this acid itself.
However, there is no recognized formula for calculating the amount of lactic acid needed in this step. Just make sure you get the wort to a pH range of 4.0 to 4.3. Add the acid in bits, measuring the pH each time until you reach the desired pH.
In the course of our research, we found that a 5-gallon wort would require about 15 to 25ml of food-grade lactic acid. Therefore, adding the acid to the wort in bits of 5ml until you attain the desired pH is an ideal option.
-
Step 6: Inoculate the Wort
As soon as you reach the right pH of the wort, pitch the lactobacillus. Gently stir the lactobacillus culture, adding it to the wort similar to pitching yeast into your beer. A larger and healthier culture will lead to quick and effective souring. Also, like in pitching, a 300 to 500 ml culture should be good enough.
It is important not to manage whatever lactobacillus strain you use. Make sure you have enough, as it is better when you have it in excess than when it is insufficient. You should also use a starter culture, if available.
Also, ensure you follow every rule of cleanliness as you inoculate. The aim is to avoid any form of contamination.
-
Step 7: Seal the Lid
After completely insulating the wort aseptically, the next thing is to ensure the brew kettle is airtight. Aside from the contamination from air, you also want to rid the contents of the kettle of oxygen. Wrapping the kettle with plastic wraps and sealing the top with a cover is the simple way to go about this.
Purging the headspace with carbon dioxide before sealing is an effective practice commonly used in many microbreweries and homebrewers across the United States. It effectively rids the wort of oxygen, ensuring good souring.
-
Step 8: Wait
You have to wait after proper sealing of the kettle and completing aseptic wort inoculation. This waiting period is when the bacteria cells start to increase, producing the lactic acid that affects sourness. However, while you wait, you will need to monitor some parameters, especially pH and temperature.
– Regulate Temperature
If you recall, we chilled the wort to a temperature range of 80 to 100 degrees Fahrenheit. This is the ideal temperature for the souring process. Therefore, it would be best to insulate the kettle with an electric blanket and heat it gently and only when necessary.
Kettle souring needs about 12 to 36 hours for completion, although this time varies. Factors affecting the souring time include the probiotic bacteria strain used and temperature. Hence, the need to properly regulate the temperature.
– Monitor the pH Reading
If you recall, we said Lactobacillus needs an acidic environment to thrive. This is why you need to ensure that the pH during souring is acidic. That way, we know the bacteria will remain viable and carry out their main purpose — fermentation.
Take the first pH reading 12 hours after sealing the kettle. You can then take the next readings at intervals of six to eight hours. The aim is to reach a pH reading of 3.0 to 3.5. It is best to use a pH meter to monitor this reading, but since you know what you want your beer to taste like, you can monitor it using your sense of taste.
As you would take pH readings at intervals, taste the beer at said intervals as well. Note that using taste as a pH metric is not good enough, especially for non-experts. Lots of sugar remnants may exist. Thus, incomplete fermentation may result, leading to an overly sweet brew rather than a fully-fermented beer.
-
Step 9: Boil
 Once you’ve reached the desired pH or taste, you can resume the normal brewing process. Boil the wort as specified by your recipe.
This kills off the remaining lactobacillus since you now have your desired tartness. Keep boiling at short intervals; about 15 minutes of boiling time is enough.
Extended boiling periods may lead to the formation of THP – an off-tasting flavor common with excessive secondary boiling in kettle souring homebrew.
-
Step 10: Pitch your Yeast
After boiling, allow to cool then pitch the yeast and wait for the beer to ferment as you would normally do. Try to use a healthy, strong yeast strain as fermentation at this stage may be a bit slower than normal.
The acidic environment isn’t ideal for yeast proliferation. A starter culture of such a strain would even be better as they would serve as a boost. Note that we are not talking about temperature regulation anymore, as there is no longer any risk of contamination. All bacteria cells die during secondary boiling.
-
Step 11: Dry Hopping
You can add hops of your choice to impart fresh flavor and aroma to the final brew. It is important not to add hops until the final boiling stage because hops will inhibit the probiotic bacteria, which translates to less souring.
-
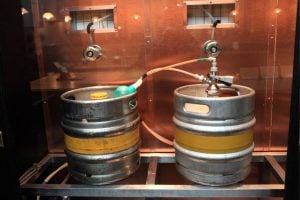
Step 12: Packaging
Once you have your beer fully fermented and dry-hopped, you could say that the brewing is complete. However, you can’t just leave the brew in the kettle or whatever container you have it in. Instead, you now have to proceed to the packaging.
Kegging or bottling is the go-to packaging system in most craft and microbreweries. However, before packaging, you can decide to test out your brew. Pour yourself a glass and enjoy a premium quality sour beer with every gulp.
If the brew is in large quantities, you could put it out for sales, where it would serve as a source of income. Otherwise, you can enjoy it with your friends and family.
Frequently Asked Questions
Here are the answers to some of your burning questions regarding kettle souring.
– What Are the Various Kettle Sour Beer Styles?
There are several styles of beer under this class such as Gose, Berliner Weisse, Sour IPA and Fruited Sours. Beers brewed using this method develop the desired sour taste in almost no time compared to the long periods it would normally take. But that’s not all; this technique yields beers of top-notch quality as well.
Using this method, several brewers have made some distinct and fascinating sour beers of great quality. Below is a brief overview of some of the most common kettle sour beer styles.
-
Gose
This is a traditional German beer native to Goslar, Germany. Its dominant flavor includes a lemon tartness with herbaceous notes, and there also exists a unique saltiness.
All in all, the beer flavor seems uncommon but very likable. It is an interesting beer with a moderate alcohol content of 4 to 5 percent. Gose Gone Wild by Stillwater Artisanal Ales is a great example of this beer style.
-
Berliner Weisse
The Berliner Weisse is another classic German sour beer native to the capital – Berlin. It is a hazy beer with a sour but refreshing taste. It is probably the most brewed beer using the souring kettle technique. A great example of this beer is DFPF by J. Wakefield Brewing.
-
Sour IPA
The sour IPA beer style is a fine blend of hoppiness with sourness, giving rise to a great beer that fits well into two beer styles. It’s a nice sour beer and a fine IPA, and it is well-flavored with hops of fruity flavor.
The tartness of the beer allows the tropical notes to shine. Belgian lambics and gueuze are great examples of sour IPAs.
-
Fruited Sours
The addition of fruit flavors to beer is not uncommon for sour beers. Fruited sours are a complex, sophisticated type of beer. Brewers use several fruits to flavor sour beers to provide some juicy and fascinating flavors.
Fruits like blueberries, raspberries, mangoes and cherries are some of the available options. They are often added during secondary fermentation. A top example of this beer style is the Blueberry Muffin by Great Notion Brewing.
– What Is the Difference Between Sours and a Kettle Sour?
The main difference between these two sour beers is in the vessel used to impart souring, as kettle souring involves fermenting beer with the aid of the probiotic bacteria (lactobacillus) in a kettle, while traditional sours use barrels of wood. The kettle souring process takes place in less than three days.
Traditional sours, on the other hand, involve leaving beers in barrels of wood with a mix of microbes to allow aging to occur. Where souring in (steel) kettle happens within a day or two, souring in (wood) barrels may take up to two years or more.
– Why Won’t Your Wort Get Sour?
The wort may not get sour if the kettle souring process is not followed as it should; another reason for not getting a sour wort could be that the wrong bacteria strain is being used. If you follow the kettle souring process correctly, souring should start after 12 hours.
If you do not notice a pH drop within the first 12 hours after inoculation with bacteria, you should check the temperature regulation. Ensure you maintain wort temperature at 80 to 100 degrees Fahrenheit. Raising the temperature a little above 100 degrees will further stimulate the proliferation of the Lactobacillus culture.
You can also reboil the wort to kill off every other organism. Ensure pH is at 4.0 to 4.3, and you can acidify with lactic acid if it is higher than this range. Then inoculate fresh strains of the bacteria, preferably a starter culture.
Conclusion
 Using this detailed article as a guideline, brewing a top-notch kettle sour shouldn’t be a problem, but a fun activity instead. Let’s recap all the important points we discussed in the guide above.
- Kettle sour is a beer fermented in the presence of Lactobacillus. The kettle souring method is an easy, quick and effective technique for brewing sour beers. It allows the brewing of these beers to be done within two to three days.
- As with other brewing techniques, preparing all the necessary equipment, ingredients and materials is the first step to take in this technique.
- The other steps include mashing, pasteurizing the wort, chilling and acidifying the wort and inoculating the wort with the Lactobacillus. The next step is to seal the kettle, regulate the temperature and check the pH level at intervals.
- The sour beer is ready after proper fermentation, and you can package it in a keg or bottle.
- Some of the ways to ensure you get a sour wort is to maintain the wort temperature at 80 to 100 degrees Fahrenheit, keep the pH levels between 4.0 to 4.3, and use the right bacteria strain. You can also choose to reboil the wort to kill off the organisms present.
Brewing a kettle sour is not rocket science; all you need to do is follow each step carefully, without omitting anything.
What you’ll get in the end is sure to amaze you!