No Chill Brewing: Does It Make Brewing Chilling or Tedious?
 No chill brewing is the Australian approach of placing hot wort into a sealed container and cooling it gradually over time. Brewers in Australia have developed a method of wort chilling that uses no chiller as a water-saving solution.
Many folks are perplexed when they hear about no chill brewing for the first time. Does this imply that you’ll never chill your beer? Is that something you can do? This article will touch upon every aspect of no chill brewing, including its benefits and drawbacks.
What Is No Chill Brewing?
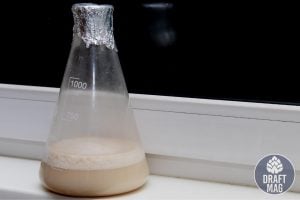
Simply put, the no chill brewing method involves transferring hot, recently boiled wort to a clean HDPE (high-density polyethylene) container and letting it cool naturally until the homebrewer determines that it’s time to ferment. Note that this can happen up to 8 weeks later — with no side effects in certain circumstances.
There are times when water is scarce in Australia. Furthermore, the temperature of this country’s groundwater is extremely high to chill the wort adequately, so they invented the no chilling method purely out of necessity.
Instead of using an immersion or counterflow device to cool wort after a boil, these Australian brewers have found success by simply racking to a suitable container and letting the wort sit there until it’s cool enough to pitch yeast.
The no chill method has garnered massive popularity in recent times–brewers looking for easier, faster, and less expensive ways to brew have embraced it.
– Overview of the Process
The no-chill method asks the brewers to pump the boiling wort into tall plastic bottles known as brew cubes. Traditionally, these cubes are pasteurized by the hot wort to avoid infection.
The brew cube is ideal for this method, thanks to its high surface area to volume ratio, which means the liquid will cool considerably faster than if it were in a shallower container.
The taste will most probably be bitter while the wort in the cube is still hot — similar to a long hop stand in some regards. Many brewers apply an adjustment rule of some kind, such as adding 10 percent to the IBU figure. However, this figure keeps changing since different hop additions may include varying amounts of non-isomerized alpha acids.
How To Brew Beer Using The No-Chill Method?
The no chilling method is fairly easy, the only requirement being correct knowledge and expertise. Here is how to brew using the no chill method:
– Choose the Correct Hop
 If you want the wort to be left hot at the end of your brew day, use entire hops rather than pellets and hop bags. Hop bags are inconvenient to use, despite the fact that the whole beer hop is often more expensive than pellets.
Bags will help you extract the beer hops after the boil, halting any isomerization of alpha acids and ensuring that you don’t wind up with any unexpected IBUs in your beer. On the other hand, using entire beer hops decreases the risk of undesired hop particles containing unextracted alpha acids.
– Sanitize the Chill Cube
This approach will have you take the just-boiled wort and immediately transfer it to a sanitized and clean no chill brewing vessel, which should be free of BPA and HDPE.
This method of brewing does not necessitate delaying yeast pitching for a few hours. Any invasive bacteria or other critters that manage to get into your beer, in fact, will be able to flourish and colonize it in the absence of yeast.
– Find an Appropriate Container
Don’t forget to take your wort out of the kettle. The kettle at this point is very hot and will store the heat longer than a cool, fresh container. Find a suitable place to store the wort until it cools.
Also, get something graded container to replenish any liquid lost in the container due to boiling. Using cold water or ice will speed up the chilling process, but it’s not required.
– Transfer the Hot Wort to the Container With Care
The container is then sealed and shaken very carefully using oven mitts to ensure that the boiling wort covers the container’s interior in its entirety, further assisting in properly sanitizing the container.
– Expel the Air by Squeezing
Next, pull the air valve from the back of the vessel and carefully squeeze all the air inside the container with oven mitts or cloth before replacing the air valve and reattaching the container.
– Place the Lid End Down and Close It
Now let the wort overnight to cool at room temperature. Remember that some time is needed for the cold break to settle before storing it upright to cool. Cooling wort overnight will help in this procedure.
Benefits of No Chill Brewing
Why should you go for no chill brewing? What are its benefits? This and many more questions find their answers in the following section:
– Saves Time
You will save a considerable amount of time should you eliminate the chilling stage in your brewing procedure. Avoiding the chilling process helps you save the time it would have taken to chill and clean the chiller. Also, skipping the sparge will save anywhere from 0 to 30 minutes compared to batch sparging and up to 45 minutes compared to fly sparging.
– Offers Flexibility
You can brew now and ferment later, increasing the amount of beer output. Temperature management during fermentation necessitates the use of a chiller or refrigerator for the duration of primary fermentation.
When using the no chill brewing method, you can brew numerous batches as the weather or your schedule allows, then store them in their sterile no chill cubes until your temperature-controlled chamber is ready.
Those with a limited number of fermenting tanks can also profit from this process. Back-to-back fermentation reduces the amount of work necessary in cleaning and storing yeast until you can brew another batch by allowing you to re-pitch yeast right away.
– Saves Water
Generally, cooling methods use absurdly large amounts of water but not this one! You save anywhere between 15 to 20 gallons of water by using this method of cooling your wort. So, if you’re concerned about water conservation, this is the method for you. Also, no high-priced chillers are required.
Drawbacks of No Chill Brewing
 The no-chill method defies all standard post-boil cooling principles and may increase the risk of all the unpleasantness that rapid chilling is supposed to eliminate: chill haze, dimethyl sulfide (DMS), and so on. However, brewers who practice the procedure claim that their beers come out perfectly.
If you are still curious about the downsides of no chill brewing, read ahead!
– Chances of Contamination
Contamination is the main deterrent when it comes to using no chill brewing. Bugs can readily deposit in the delicious sweet solution of freshly made wort. As such, they can infect what is otherwise a beautiful batch of homebrew as soon as the heat is turned off on boiling wort.
Wort cooling and yeast pitching need to be done with as quickly as possible so that they can fight off any pests that may have accidentally made their way into the brew!
– Issues With Isomerization
When you employ the no chill approach, your wort will stay at isomerization temperatures for a longer period than usual. At 175 F (79 C), alpha acids will isomerize to iso-alpha acids.
This will significantly increase the bitterness of your beer. A well-designed recipe can reduce this risk, but it will take some trial and error. Despite this, many brewers avoid creating IPAs without chilling.
– Slower Shut Down
Since the no chill method doesn’t provide a speedy shutdown of hop transformation, the beer will remain bitter. While this isn’t inherently problematic, it does result in a loss of control, making accurate IBU calculations practically impossible. Plus, when hops are boiled for an extended period, they might acquire an odd taste.
Additional Tips for Better Brewing
Here we share with you a few tips for brewing the best possible beers using the no-chill method:
– Avoid Using the No Chill Brewing Method for Hop-forward Brewing
If a homebrew recipe contains more beer hops and is intended to highlight them, the no chill brewing may throw it off. Instead, consider a malt-forward formulation, such as a darker type. You may prefer sour or yeasty flavors since these styles can conceal or overturn overused hops.
– Add Ice Cubes
To get things started, use smaller batches or add a few ice cubes into the wort. The chilling beer process will accelerate on placing the wort in the refrigerator or another cool location.
– Use the HDPE Containers for Fermentation
Use the HDPE container for chilling and storing the wort for fermentation. However, you won’t have much room during the primary fermentation since you’ve probably used a container that’s close to the amount of the wort. To avoid blow-off problems, apply Fermcap-S (or any other anti-foaming agent) during fermentation.
– Use Plastic Instead of Glass
Never pour boiling wort into glass vessels! You face the threat of broken glass injuries and severe burns.
Why No Chill Brewing?
The most significant advantage of the no chill method is it’s pleasant! Simply turn off the source of heat and let nature do its thing. Of course, it’s critical to cover the cooling wort and place it in some form of container (such as a clean fermenter) to keep it sterile.
Furthermore, the majority of chilling methods require a large amount of water. Even a good plate chiller, which uses less water than an immersion chiller, will chill the wort using a lot of water. This is a severe issue for budget-conscious home brewers.
Chilling demands a significant amount of time. Brewing using all grains is a tedious process itself, let alone the 30 minutes it takes to cool the wort. A brew day can easily be cut in half by removing the chill. And it’s always a wonderful thing to have less cleaning to do.
FAQ
Is No Chill Brewing used only in Australia?
No Chill Brewing originated in Australia, but it’s now used worldwide by homebrewers and commercial breweries as a convenient alternative to traditional cooling methods.
How long can wort sit before pitching yeast in No chill brewing?
Wort can sit for a few hours to a day before pitching yeast, but it’s best to keep it below 140°F to prevent bacterial growth.
How do you transfer hot wort to fermenter?
Use a siphon or transfer pump to move hot wort to the fermenter, making sure to minimize exposure to air to avoid contamination.
Endnote
 No chill brewing in the homebrewing world is still a topic that needs more research and development, so it’s up to you to determine whether the above data is convincing enough- although we back it a hundred percent.
All in all, the no chill method has its benefits and a few drawbacks, too. It comes at a modest cost, so it wouldn’t hurt to try it out and see whether it is right for you.