Bottle Conditioning Beer: How It Works and Why Everyone Does It
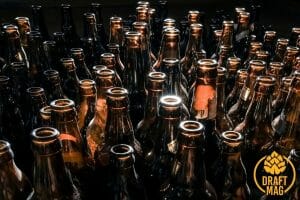 Bottle conditioning beer means adding a little sugar to the beer before sealing it in the bottle.
With its interesting premise, it is also an exciting topic for homebrewers looking for a chance to upgrade their skills.
If you’re curious about what’s in your beer or want to learn how to bottle condition your beer, we’ve put together all the essential resources into this comprehensive guide. Continue reading to know everything about bottle conditioning your beer.
What Is Bottle Conditioning?
Bottle conditioning is a method of carbonating beer involving adding a little sugar to the beer before sealing it in the bottle. This leverages the live yeast in the beer, still suspended after fermentation, and will kickstart a secondary fermentation process. In this period, the beer produces carbon dioxide and slight alcohol while still in the bottle.
The carbon dioxide can’t escape from the bottle so the beer absorbs it, leading to fermentation. Thus, the beer continues to age while in the bottle, so when you purchase a bottle conditioned beer, you know that it is still fermenting inside.
Like wine, allowing your beer to ferment gives you a deeper and mature flavor and taste and a slight touch of carbonation. Bottle conditioning rests on the concept that beer becomes better the longer it rests in in-bottle fermentation.
Keep in mind that there would be dead yeast cells at the bottom of the bottle in the form of a thin film, but this is only a part of the style.
How To Know if Beer Is Conditioned
First of all, check the label. It’s pretty easy to figure out whether your beer is conditioned or not, especially if it’s a packaged one. Breweries usually indicate that the beer is carbonated on the packaging so their customers know what to expect. Some breweries go the extra mile by changing the “best before” tag to a “best after” one.
However, if the packaging has no labels or you are trying to homebrew, you can figure it out through other clues. The bottle will be heavier, and you will hear a hissing sound as you open it. There will also be yeast sediments at the bottom of the bottle.
Why Everyone Does It
Conditioning beer in a bottle is pretty popular among breweries and homebrewers for diverse reasons. Regardless of reason, this shows that it’s easy to find one at your favorite liquor store or make your own. Let’s look at the various reasons why brewers love making this beer and the benefits it has to offer.
Why Breweries Condition Beer
Conditioning beer is done chiefly by craft breweries and not mass beer producers because they are known for taking risks and trying out experiments. Some of the reasons why breweries want to condition their beers are listed below.
-
It Is a Traditional Method
Secondary fermentation has been around for centuries when it comes to brewing beer, so these have been conditioned. This is why many people see bottle conditioned beers as real ale, unlike those made with forced carbonation.
-
Better Shelf Stability
Conditioning beer means that it can be stored for a much longer time on the shelves since the yeast is consuming the oxygen inside the bottle. Because of this, breweries condition their beers to make them last longer.
-
They Can Be Exclusive
Some beers, such as vintage wines, are unique, so breweries sometimes make a small, limited edition batch of conditioned beers. The beers might be from several years ago, and enthusiasts would still be eager to purchase them.
-
Better Taste To Impress Customers
Since beers that are conditioned feature more depth in their flavor and aroma than those made with forced carbonation, brewers enjoy giving this mature taste to their customers. The beers can even have spicier hints if you mix the yeast with it as it was poured or consumed out of the bottle.
Why Homebrewers Condition Beer
Although there are some economic reasons why brewers like conditioning beer before selling it, keep in mind that this process takes longer and some producers don’t want to go through the effort. But if breweries are conditioning beer to make better sales and impress their customers, why will a homebrewer also follow this method?
-
It Is Cheaper
When you decide to carry out homebrew conditioning, you will spend less than having to buy equipment to keg the beer. Thus, homebrewers like the idea of saving money on their beer-making process while benefiting from the mature taste.
-
Beer Lasts Longer
Conditioning beer is also a fantastic way to increase the shelf life of your batch. If you want your beer to last longer, whether you’re making a large batch or you want to experiment with aging, then you should condition it. You can note how the flavor develops and decide when it has achieved perfection.
-
It Frees Up Refrigerator Space
Refrigerator space is usually a problem for enthusiastic homebrewers who make beers regularly. Conditioned beers do not need to be refrigerated, they only need to be kept at room temperature. Thus, you get more space in your fridge for other beers that you might have made.
How to Bottle Condition Beer
If you want to make your bottle condition brew, you can follow the steps below to get started.
-
Step 1: Get the Right Equipment
The first thing to do is put all the equipment you need to condition your beer together. The bottles are essential, and it’s recommended to use light glass bottles. A bottling bucket will also come in handy when bottling and will offer convenience.
Other equipment you will need are the stirring spoon, plastic, auto-siphon hose, drying rack, bottle filler, bottle caps and capper.
-
Step 2: Check for Primary Fermentation
Once you have all your tools together, you can check the beer that you are brewing. Ensure that the primary fermentation is complete by using your hydrometer to check the final gravity, which must be close to the specific gravity. If you’re not sure, you can leave it to ferment for three weeks before putting your conditioning tools together.
-
Step 3: Prevent Contamination
To prevent your beer from developing an off-taste through contamination, you need to clean all your equipment before starting.
Inspect them for debris or mold and wash and sanitize them. You can soak the bottles in bleach and water before scrubbing the insides and putting them in the sanitizer. The same goes for your other tools.
-
Step 4: Measure the Priming Sugar and Mix It
The priming sugar is essential in feeding the yeast, but putting too much can lead to over carbonation. Corn sugar is the commonly used ingredient for priming, although you can use others on our list.
The perfect measurement is 177 grams of corn sugar for a 5 gallon batch of beer.
After getting the right measurement for your batch, you can now mix the sugar with water, boil it, cool it, and add it to the priming bucket. Then it’s ready to go in your beer.
-
Step 5: Pour the Beer Into a Bottling Bucket
Pour the priming sugar into the bucket first, and then use an auto-siphon to rack the beer after sterilizing it. Gently mix the beer and sugar with a clean spoon, and gravity will do the rest in transferring the sugar to the beer.
-
Step 6: Fill and Cap the Beer
The next step is to fill the bottles with the beer and cover them. Remember that you should leave about one inch of headspace for carbonation. You can invest in a bottle capper to make things easier, but ensure they are adequately sealed.
-
Step 7: Store the Beer and Check the Time
With your bottle fermentation beer all packed and ready, the next thing to do is store it and wait for it to condition. After two to four weeks, you can check the beer and start drinking it if it tastes good.
– The Best Time and Vessel
The best time to condition your beer is after primary fermentation, especially if you’re a beginner. It is easy to control the fermentation process too. Conditioning the beer before proper fermentation leads to carbon dioxide and potential bombs.
The best vessel to do this is ideally in a clean container with a spigot and not a primary fermenter. The fermenter will keep the trub out of the beer or cause contamination, leading to cloudiness and wrong flavors.
– Special Instructions for Lagers
The process for bottle conditioning lagers is pretty similar to that for ales.
Lagers are usually fermented at temperatures between 53 and 59 degrees Fahrenheit. After this, you can condition it and set the temperature at 68 to 73 degrees Fahrenheit during the last two to three days. Lagers will also need a diacetyl rest before conditioning, after which you can taste the beer after three weeks.
How Long to Bottle Condition Beer
Bottle conditioning usually takes between two and four weeks, but this is dependent on a variety of factors. Different factors determine how long you wait for your beer to condition, although it matures in the bottle.
While some brewers condition for months, others do it very quickly so they can get it out to the market immediately. When conditioning your beer, you should keep these factors in mind.
– The Beer Style
When preparing for bottle conditioning, the type of beer and alcohol content you are aiming for is critical. Hoppy beers are usually conditioned for a couple of weeks, including all types of pale ales, while beers with malt and yeast characters need more time to condition. You can also get more than 8 percent of ABV by adding fresh yeast to the bottle.
– Sugar
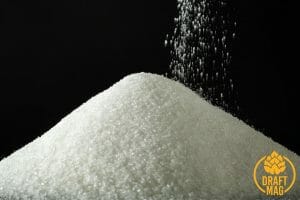 There are different ways to prime your beer with sugar, which will influence the length of the conditioning time and the final taste. You can use molasses, corn sugar, honey, malt extract, watermelon juice and the likes. Those that resolve quickly help in conditioning faster, like corn sugar and unlike honey. The quantity of sugar is also essential to avoid over-conditioning.
– Yeast
In the bottle conditioning process, using healthy yeast is pretty essential. Although you can add the yeast while brewing to assist in carbonation later, it might take longer to carbonate during the secondary fermentation. Therefore, it is advisable to add fresh yeast while bottling.
– Time
You can’t know whether your beer has been conditioned or not except by checking the time. To achieve the right flavor, you can taste the beer after two weeks. You should be able to hear the carbonation sound when you open the bottle, but if you’re still new to this and unsure, you can leave it for four weeks before drinking.
– Temperature
It’s essential to keep your beer in the right environment to assist with carbonation. The ideal temperature for bottle conditioning beer should be between 68 and 80 degrees Fahrenheit. Warm conditions will increase yeast activity, leading to faster carbonation.
– Type of Bottle
Although you might not pay much attention to it, the beer bottle you use can also affect the conditioning quality. You can use plastic or glass bottles, and while the former is more affordable, the latter contributes more to conditioning. You can also use light-colored bottles to let in more light and warmth for conditioning.
The Problem of Over- or Under-Carbonation
If you leave your beer to condition for too little time or too long, you end up with an over- or under-carbonated beer. This is why some homebrewers will tell you to set one bottle apart as your testing bottle.
You can put some beer in a plastic bottle and shake it regularly to check the carbonation process. You will quickly see the foam level and the yeast sediment at the bottom, which indicates that it is carbonating properly, but if it is over- or under-carbonated, there will be obvious signs.
Over-carbonation is caused by too much sugar, so the bottle pops loudly when you open it. The foam appears rich but disappears quickly. In extreme cases, you might even end up with exploding bottles.
On the other hand, under-carbonation can still be fixed. You will notice no yeast sediment and no sounds when you open the bottle. If this happens, add small amounts of sugar and yeast to all the bottles and try again.
Tips for Storing Safely
It is essential to store bottle-conditioned beers properly to avoid contamination and over-conditioning as there is still active yeast inside the beer. Here are some essential tips.
- Don’t put the beer in the refrigerator.
- Store the beer with the cap up and not on its side.
- If you’re unsure about the ideal temperature, go with 53 degrees Fahrenheit.
- Don’t shake the bottles too much, only your test bottle, so you don’t disturb the yeast.
- Store in a cool place away from direct sunlight.
- Don’t store in warm temperatures as the yeast is still active and this can lead to over-carbonation.
How To Serve and Drink Bottle Conditioned Brews
Now that you’ve followed all the tips and tricks above and your beer is ready to serve and drink, you also need to do it in the right way. Because of the yeast sediment in the bottle, you need to do a slow pour in order not to pour out all the yeast.
Do it slowly and smoothly to avoid disturbing the yeast. Also, remember not to pour the remaining amount of beer in the bottle so you don’t drink the yeast sediment.
Some beer enthusiasts are worried about directly drinking their conditioned beer from the bottle. Although you can do that, you will end up drinking the sediment. While this won’t hurt you and will even increase the yeast flavors, beginners might feel uncomfortable with this, so you can start by using a cup then drinking from the bottles later.
Taste
Before you decide to condition your beer, you might be worried about whether it will taste better or worse than regular beer. But, just like all other types of beers, whether it tastes better or not depends on your palate and preferences.
Usually, conditioned beers feature a more stable head, complex flavors, and finer bubbles than a typical beer. So if you want to try something new, this can be an excellent place to start. You can start with a small batch and try it out after conditioning. If you like it, you can add it to your list of beer preferences.
In the homebrewing community, conditioned beer is unique because of the patience, skill and labor required to make a perfect batch.
Is Bottle Conditioned Beer for You?
 The only way to answer this question is by trying out bottle conditioned beer yourself.
You can buy some top-conditioned beers from a liquor store or try your hand out at making the brew.
- Bottle conditioning beer involves carbonating it by adding some sugar and yeast after fermentation and leaving it for some time.
- You can quickly identify conditioned beer by the hissing sound the bottle makes upon opening and the yeast sediment settling at the bottom.
- Breweries and homebrewers bottle condition their beers for the complex flavors and long shelf life.
- It’s advisable to condition beer after primary fermentation.
- The ideal temperature for bottle conditioning is between 68 and 80 degrees Fahrenheit.
- The time to condition beer depends on different factors but should be between two to four weeks.
- Store your beer in a cool and dry place, away from direct sunlight.
- Serve the beer with a slow pour.
- Whether or not you will like conditioned beer depends on your preferences, and tasting it is the best way to find out.
Try out our technique to make your bottle-conditioned beer today, and find out if you’ll add it to your list of favorites!
Disclaimer: none of the authors, contributors, administrators, vandals, or anyone else connected with draftmag.com, in any way whatsoever, can be responsible for your use of the information contained in or linked from this web page. Use at your own risk!

